
Download Crew App:
Play Store
Apple Store
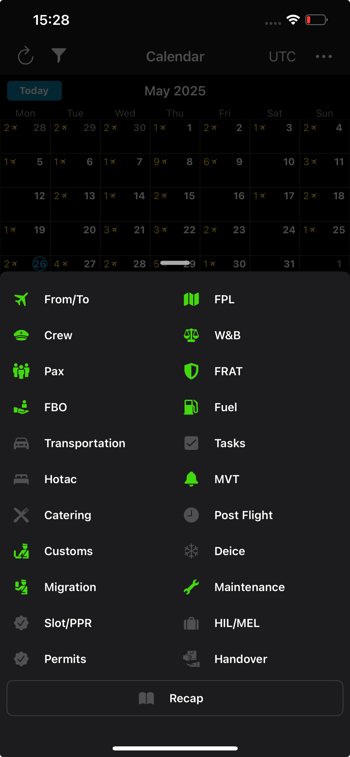
1. Main Page - Calendar
The Calendar feature in FL3XX Mobile Apps provides a centralized hub for managing your scheduled duties and assigned flights.
Offline Calendar Behavior
The calendar is optimized for offline use:
- Any month you open is automatically stored on your device
- Previously viewed months remain available offline
- The calendar loads instantly from local data, even without connection
- When back online, data updates automatically in the background
Main Screen Layout:
At the top of the screen, you will find the calendar showcasing your upcoming activities. You can browse dates from the previous and next month visible within the current calendar month. Duties and flight counts for the current month, as well as the previous and next month's dates, are conveniently displayed on the screen for quick reference.
The bottom part of the screen showcases rostered duties and assigned flights for easy reference.
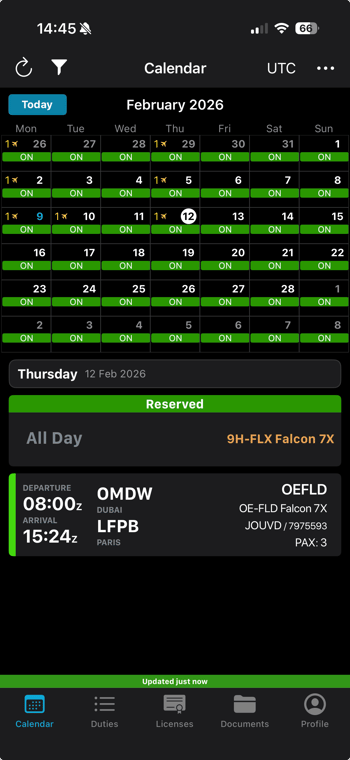
Calendar Detail View:
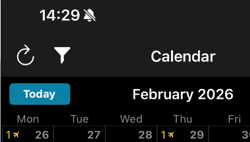
- Reload Button: Located in the top left corner, the reload button allows you to force a refresh of the calendar, ensuring you have the most up-to-date information.
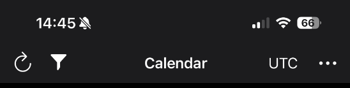
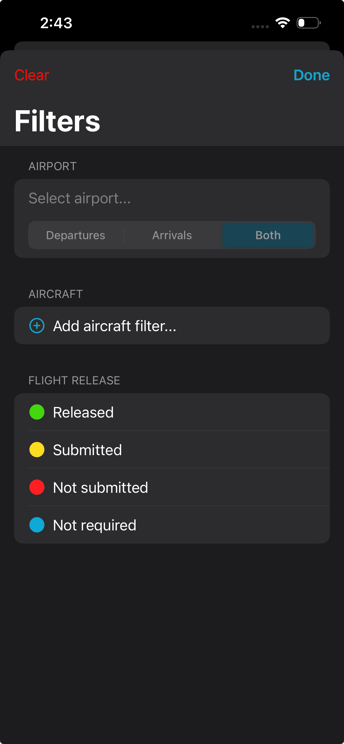
- Filter Button: Located also in the left corner, the filter button allows you to personalize your calendar view by airport, aircraft, or release status. This feature enables you to focus on specific scheduling and monitoring needs.
No Filters active:
Filters active:

- LT/UTC Switch: Located in the top right corner, the LT/UTC switch provides the convenience of toggling between local time and Coordinated Universal Time (UTC) to coordinate across time zones.
-
When Local Time (LT) is selected, the behavior of the app is as follows: the "Today" button reflects the current day based on the device's timezone, while the roster continues to operate according to the Home Base timezone. Additionally, flight schedules remain based on the Departure timezone.The LT/UTC selector applies to:
- Calendar Today Cell/Today Button Behavior: The behavior of the "Today" button reflects the current day accurately.
- Calendar Current-Day Selection: The selection of the current day in the calendar now aligns with the selected time setting.
- Duties Past/Upcoming Splitting Logic: The logic for distinguishing between past and upcoming duties.
- Duties Current Day Selection: The current day displayed in the Duties section.

-
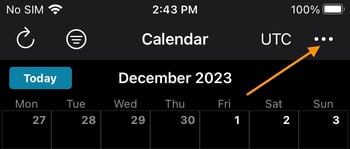
- The ⃛ (three-dot) menu: provides access to various features, such as making requests, downloading or updating flights.
- Navigation Controls: Easily navigate between months by swiping left or right on the calendar.
- Calendar days use the following logic:

- Roster Duties Display: The calendar directly integrates roster duties, ensuring all your scheduled tasks are visible at a glance, eliminating the need for switching between different screens.
- Detailed Duty Information: Tap on any duty displayed at the bottom of the calendar to access more details. To return to the calendar view, simply drag the screen downward.
- On Android, the current date displayed for both 'Selected + Current' and 'Current' days is based on Coordinated Universal Time (UTC).
-
Tap Today to jump to the current day, and the app will automatically redirect you to the present day based on the device's timezone when Local Time (LT) is selected, or Coordinated Universal Time, when UTC is selected.
![]()
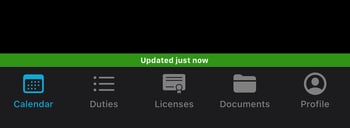
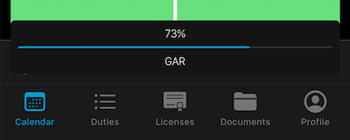
- The bar at the bottom of the Calendar and Duties screen shows the last update time of your data. In online mode, it displays 'Updated just now'. If you go offline and open a flight section within 5 minutes, it will still show 'Updated Just Now'. After 5 minutes, it will show 'Updated 5 minutes ago' and continue to increase until you are back online. Once you are online again, it will show 'Updated Just Now'.
Filter types available:
-
Airport – Filter by airport (ICAO) and movement type (departure / arrival / both).
-
Aircraft – Filter by specific aircraft.
-
Flight release status – Filter by status (e.g., Submitted, Not submitted, Released, Not required).
Ops Team & Aircraft Filtering
You can now filter your schedule using Ops Teams and multiple aircraft:
- Select one or more Ops Teams to display all aircraft assigned to those teams
- Select multiple aircraft at the same time
- Combine both filters for more precise results
- Filters are applied to your schedule and persist across sessions until manually cleared
The filter order follows the web app: Ops Team → Aircraft → Airport
Important: Filters affect only the activity list at the bottom of the screen, not the flight counts shown in the calendar grid at the top. The top calendar always shows the total number of flights per day, while the bottom list shows only the items that match your active filters. This means you may see a “1” on a calendar day but no flights in the list if that flight does not meet the current filter criteria.
Calendar grid (top):
The grid shows total counts, while the list shows filtered results.
In detail, the flight counts are loaded via a general “all flights count” request on the Dispatch page. This request ignores the most recent filters and does not use any filter parameters, so the numbers shown in the grid are always unfiltered totals.
Day list (bottom):
The list is loaded via a “flights and duties for a specific date” request, which takes the most recent filters into account. It adds airport and aircraft from the active filters and then applies the filters to the flights, so the list is filtered by airport, aircraft, and release status.

In summary: the grid shows total counts, while the list shows filtered results. Seeing a “1” in the calendar grid but no flights in the list, when that single flight does not match the active filter, is the expected behavior.
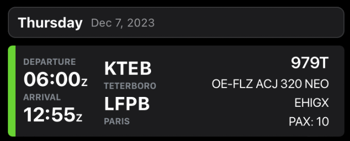
Flight Status Color-Coding:
To provide an immediate overview of flight statuses, we utilize color coding on the left side of the flight cell:
- White dot: Indicates that the flight has not yet been reviewed by the crew member.
- Green (solid line for passenger flights, striped for positioning flights): Represents flights with all services confirmed, signifying that the flight is ready to proceed.
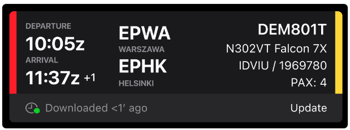
- Red (solid line for passenger flights, striped for positioning flights): Indicates that dispatch is still working on mission-critical details, requiring attention and further action.
- Yellow (solid line for passenger flights, striped for positioning flights): Highlights flights with some details not yet confirmed, emphasizing the need for attention by dispatch.
- Magenta (solid line for passenger flights, striped for positioning flights): Denotes flights that are currently undergoing revision by dispatch. The details may be updated soon. Refer to the flight details for further information.
We have also a "+1" Day Arrival Indication for flights that will be landing the following day. This feature indicates that the flight is scheduled to arrive on the next calendar day.
Flight Details Overview:
To review a specific flight, simply tap on it, and a pop-up window will display all the relevant flight information. From there, you can easily navigate to different tabs by tapping on the respective icons.
The different flight items are color-coded:
- Red indicates that the dispatch or the supplier has not yet begun working on the item, or that there is an urgent task that needs to be addressed.
- Yellow indicates that the item is currently being worked on by dispatch and is in progress.
- Green means that the item is fully arranged by dispatch, or by the supplier. For example, all Passenger info is added, or the Services are confirmed.
- Grey means that the item is not applicable to the flight.
- Magenta indicates that there is a need for revision for something that was previously confirmed.

Details:
The Crew App is designed to display only Flight and Crew Notes, with the Post-Flight button prominently highlighted for easy access.
The Flight Notes section is strategically positioned at the end of the icon list, supporting optional notes while maintaining a consistent style and alignment.
In terms of note types, the Crew App focuses on Flight Notes and Crew Notes, ensuring that crew members have the necessary information at their fingertips.
In the Dispatch App, the Recap button is prominently highlighted, and the icon order is aligned with the tab order in flight details. The Dispatch App also displays a broader range of notes, including Flight Notes, Crew Notes, Planning Notes, and Booking Notes, catering to the comprehensive needs of dispatch operations.
Flight Details:
When viewing the details of a flight in FL3XX mobile apps, you can tap on any of the items to open the flight detail page. The basic flight details, such as the flight number, date, departure, and arrival airports, are displayed on the top of the screen.
To access flight details, tap the button located at the top of the screen, which provides essential information to assist you in preparing for and tracking the flight.

To navigate through the details, you can scroll the tab menu left or right. Each page contains information about both the departure and arrival airports, with a colored line above the tab icon on the top of the page applying to the departure airport and the line below the arrival airport.
You can find all the item details in the Flight Details section.

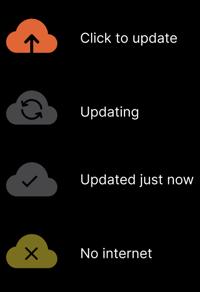
To keep your data up-to-date and synchronized with the web app, simply press the cloud icon located on the right side. Here is a quick overview of the different icon statuses to help you keep track of your data.
2. Duties
The Crew App provides a dedicated Duties list view, complementing the main Calendar page. This feature efficiently organizes your scheduled duties, allowing you to track completed tasks and plan for upcoming responsibilities.
To access the Duties view, simply tap on the Duties icon located at the bottom of the screen. Within the Duties screen, you will find two tabs: Future and Past. The Future tab displays all your upcoming scheduled duties, while the Past tab showcases completed duties.
Each duty listed in the view includes essential information such as the date, time, and duty type. Tap on any duty to access more detailed information.
Note: Please note that for future and past duties, we display flights and duties that are limited to 30 days ahead and 30 days in the past.
3. Licenses
Tap on the Licenses on the bottom menu. Here, you can view a comprehensive list of your assignments, recency, and qualifications, including relevant details such as the date of issue, expiration date, and license number.
Qualification categories are now collapsible, making the interface more streamlined. Tap the blue section titles to expand or collapse details.
Please note that access to this information is granted based on certain user roles. Users with Crew, Crew (FA), Crew + Owner, Crew + Persons, Crew Plus, and Crew + Timeline roles will be able to view this section.
The color of qualifications in the Licenses tab is determined by several factors, including the expiration date, revalidation period, and the number of days until expiration. The color indicators vary from yellow to red, with specific details outlined below.

Yellow signifies that the revalidation period has commenced or is nearing expiration. By default, this begins 90 days prior to the expiration date and enters a critical phase 5 days before expiration, unless otherwise specified based on your operator settings. If you see a flashing yellow indicator, it means that the qualification is set to expire in 5 days or less. Conversely, a red indicator denotes that the qualification has already expired or lacks an expiration date altogether.
Mandatory qualifications are clearly indicated with an "R" for easy recognition. These qualifications also adhere to the same color coding system previously described, ensuring consistency in how information is presented.

If your training department has uploaded a scanned copy of a license, you will notice a blue icon in the qualification or license areas. To access the document, simply tap on the paper clip or document name.

The Licenses section offers a user-friendly method for monitoring your qualifications, and licenses, and accessing any accompanying documentation. It's important to note that we do not show Archived items on the licenses page to maintain organized lists and improve user navigation.
Qualification-Derived Recency Conditions. The Licences → Recency section in the Crew App includes recency conditions sourced from crew qualifications (such as EFVS and airport recency), in addition to assignment-based conditions. How to view: Crew App → Licences → Recency. All recency conditions are listed, including qualification-derived ones. Deduplication: If the same condition name appears in both assignments and qualifications, it is shown only once.
4. Documents
In FL3XX Mobile Apps, managing your operational documents, manuals, and other relevant files is made simple. Follow these steps to utilize the document management feature effectively:
-
Accessing Documents: To access your operational documents, manuals, and other relevant files, navigate to the "Documents" option located at the bottom of the app's menu. Here, you can view and download these files for offline access. To refresh the view with any changes made in the web app, simply click and drag down. The default for the "Documents" page is now "My Documents".

-
Viewing and Downloading:
-
Users can effortlessly download documents and guarantee they can access them offline, even those that were added after the initial download. This enhancement fills in the gaps that were previously identified in the logic for downloading documents and accessing them offline, resulting in a smooth and seamless experience for managing your documents.
- Users can now easily download newly added documents in the documents section. A convenient download button has been added to the top right corner of the screen for quick access.

- When you first log in, a helpful tooltip will guide you through accessing the Documents section for the first time after downloading the app. By clicking on the continue button, the download process will start. If you click outside the tooltip, it will disappear, and the download will not begin.

- Once all documents are downloaded and ready for offline access, the download button will show a blue checkmark.

-
- Handling of New Documents:
- If new documents are added to your account through the web application or if the system detects new documents, the blue checkmark indicating all downloads will disappear. This prompts users to download the latest additions. This feature automatically triggers when you open or refresh the "All Documents" or "My Documents" sections, ensuring that you have access to the most up-to-date offline content in both areas.

- If new documents are added to your account through the web application or if the system detects new documents, the blue checkmark indicating all downloads will disappear. This prompts users to download the latest additions. This feature automatically triggers when you open or refresh the "All Documents" or "My Documents" sections, ensuring that you have access to the most up-to-date offline content in both areas.
- Document Acknowledgment:
- To acknowledge that you have read a document, click on the button located in the top right corner of your screen.
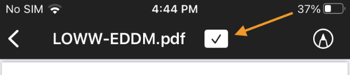
- To acknowledge that you have read a document, click on the button located in the top right corner of your screen.
- Document Download Options:
- In the Settings page, you have the option to choose the preferred document download settings:
- "Only with Wi-Fi": Documents will be downloaded only when connected to a Wi-Fi network, optimizing bandwidth usage.
- "Using Mobile Data/LTE": Documents can be downloaded using mobile data or LTE connectivity, enabling access even when Wi-Fi is not available.
- "Using Mobile Data/LTE only for Flight Documents": Mobile data or LTE will be used exclusively for downloading flight documents, providing greater consideration for bandwidth constraints and roaming costs, particularly in remote areas.
- In the Settings page, you have the option to choose the preferred document download settings:
- Access for Crew Members and Admins:
- Crew members who have Roles with OPS_DIRECTIVE_READ access rights can view only the documents in 'My Docs' that have been shared by administrators.
- Administrators with the role of Admins have complete access to all company documents in the 'All Docs' section. They are responsible for sharing the necessary documents explicitly with crew members.
- For a more comprehensive understanding of roles and access rights, we recommend referring to the relevant article.
Additionally, the search functionality has been moved to the title section, and the bottom popup offering to download documents has been removed for a cleaner interface. This new approach ensures that downloading is efficient and user-friendly, allowing you to keep your documents up-to-date and accessible even when offline.
5. Profile
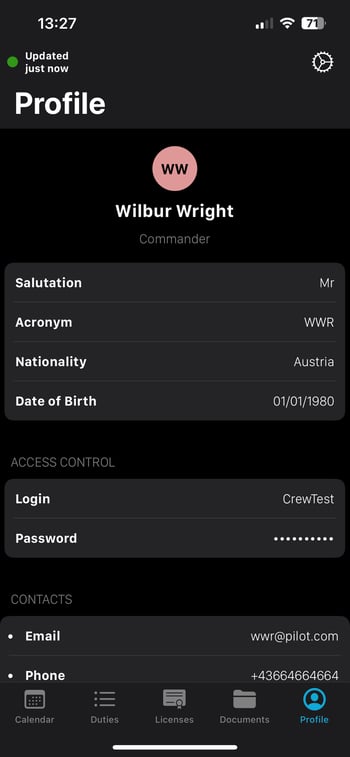
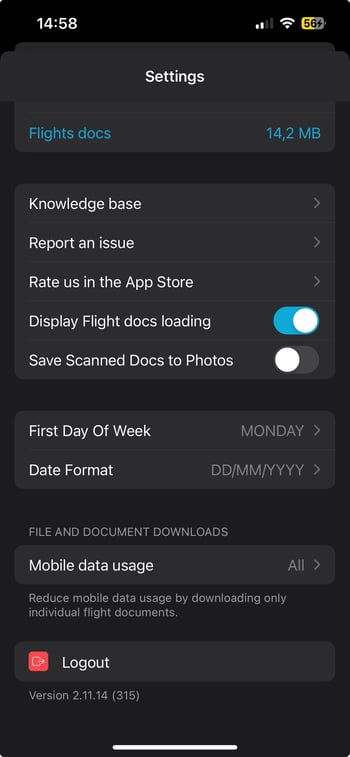
Settings
The Settings page in the mobile app allows you to adjust your app preferences and settings. Here are some of the things you can do on the Settings page:

- Adjust Notifications: You can choose if you want to receive push notifications, such as flight updates or alerts.
- Adjust In-App Alerts: This allows you to choose whether or not to receive alerts while using the app. There are three options to choose from: "All", "Flights within 24 hours", or "None". The "Flights within 24 hours" option is based on the departure date and time, and set as default. On iOS, this setting also applies to Duties, while on Android, it only applies to flight updates. An example of an in-app alert is available here.
- Clear caches: You can clear your app cache to free up space on your device and improve app performance.
- Knowledge base: Access our knowledge base directly from your mobile app for easy reference and information retrieval.
- Report an issue: If you encounter any issues or bugs with the app, you can report them using this feature.
- Display Flight docs loading: you have the option to view the loading progress of your flight documents. While documents are typically downloaded in the background, you can choose to monitor the progress bar as we fetch all necessary flight data for you.
- Document Scanner Save Option: We have introduced a new feature that allows you to easily control how scanned documents are saved. When you scan a document within the app, it will automatically be saved to your in-app photo gallery. By default, the feature is disabled when you log in to the app.
- First day of the week: you can set your preferred first day of the week on your mobile calendar. Choose between Saturday, Sunday, or Monday to align your calendar with your personal preferences. This selection will override the default operator setting from the Web App, providing a personalized calendar view tailored to your preferences. Please note that this setting needs to be adjusted each time you log in, as it will revert to the default Web App settings upon logout.
- Date Format: You now have the option to customize the way dates are displayed on the Documents, Licenses, and Profile screens. Choose your preferred date format to make it easier for you to read and understand the information.
- Mobile data usage: Choose files and documents to download using mobile data: You can choose which files and documents you want to download using mobile data, and which ones to download only when you're connected to Wi-Fi.
- Logout from your app: You can log out of the app to protect your privacy and security.
- Finally, at the very bottom of the Settings page, you can find the app version. This information can be useful when troubleshooting issues with the app or when contacting support for assistance.
We understand that unexpected logouts are disruptive and create a risk of losing work. To reduce this impact, the iOS Crew App now preserves your key preferences when a logout is caused by token expiration. If your session expires, settings such as first day of the week, date format, and in-app alerts are retained, so critical elements like flight details and documents remain available and you can resume quickly. Manual logouts still clear all settings and local data as before.
To reduce unexpected logouts and protect access to your documents, FL3XX mobile apps now use improved session management that regularly refreshes your token.
How to keep your session active
- Stay active in the app: Your session renews automatically when you use the app or send it to the background, if the token is older than 7 days.
- Allow background activity: Enable background access in your device settings so the app can refresh the token before it expires.
Following these steps significantly lowers the risk of forced logouts.
Standardized Date Format in the Crew App
To enhance your experience, we have standardized the date format throughout the Crew app based on regional preferences. This change ensures that all date fields and date pickers consistently reflect the appropriate format for your region.
Default Date Formats:
- "International" Instance Operators:
- Default format: DD/MM/YYYY
- "United States" Instance Operators:
- Default format: MM/DD/YYYY
Human-Friendly Format:
- For a readable format, whenever dates are displayed:
- International format: "DD MMM YYYY" (e.g., "17 Jul 2023")
- United States format: "MMM DD, YYYY" (e.g., "Jul 17, 2023")
Consistency and Persistence:
- All date fields and date pickers will now reflect the selected regional date format, ensuring consistency across Calendar, Duties, Requests, and Expenses sections.
- The chosen date format persists while you are logged in, even after closing or updating the app.
- The date format setting resets upon logout or app deletion.
Optimizing App Performance in Poor Network Conditions:
It's crucial to understand how the Crew App handles network connectivity challenges, particularly during tasks that require data transmission, such as uploading a Post Flight document. Should you find yourself in areas with suboptimal network conditions, the app attempts to proceed with downloading or uploading processes. However, it does not automatically switch to offline mode in such scenarios. These attempts might result in a timeout after 30 seconds, leading to unsuccessful data transmission.
To mitigate this, users experiencing poor network connectivity are advised to manually activate Airplane Mode on their device. This action forces the app into offline mode, allowing it to store data locally without attempting any online transactions. Once a reliable network connection is re-established, users can then synchronize their data with the app. This proactive approach ensures that your work progress is preserved and subsequently synced accurately, optimizing app functionality and data integrity in varying network conditions.
Delete Confirmation Screen for Enhanced Document Management
To prevent accidental deletion of important files, the FL3XX Crew and Dispatch apps now include a delete confirmation screen for every location where a document or file can be removed. This added layer of protection ensures users can review and confirm their decision before any data is deleted.
-PNG.png?width=300&height=649&name=IMG_0099%20(1)-PNG.png)
Key areas with this update include Expenses, Slot/PPR, HIL/MEL, Post Flight, and W&B Documents. Additionally, when clearing caches in Settings, users will see specific prompts for “All Docs” and “Flight Docs”, ensuring they understand the implications of clearing cached files.
-PNG.png?width=300&height=649&name=IMG_0098%20(1)-PNG.png)