
Settings
To access the Settings page in the FL3XX Web App, click on the user menu located in the top-right corner. This page provides control over all essential options for Administrators managing your instance. To ensure proper operation of the system, only trained personnel should make changes on this page.
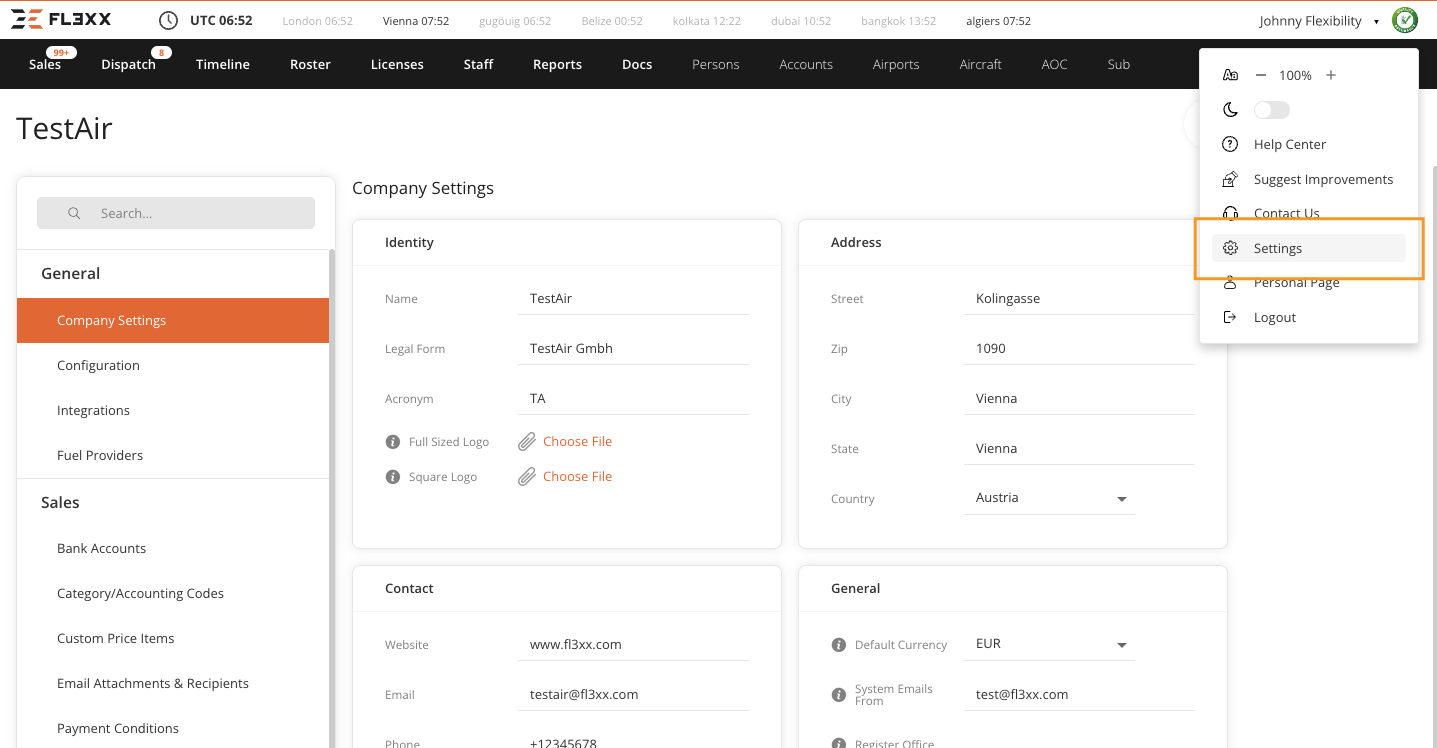
Company Settings
The Company Settings page in FL3XX allows you to manage and customize essential information about your company. From your company’s name and contact details to default policies and logos, this section ensures that all relevant data is accurate and up to date.

Tip: In the "About" section, you’ll find the current version of FL3XX in use. Hover over the information icon to view a unique commit identifier, which can be shared with support to assist with troubleshooting in certain scenarios.
Configuration
 Common
Invoice Number Schema
The Invoice Number Schema consists of three parts (format, lower bound, and upper bound) separated by the " ^ " character. All three parts must be of the same length (the length of the invoice number itself).
The format defines how counter, custom text, and the current year together form invoice number. The format can include:
- yy or yyyy - To include the current year as 2 or 4-digit number
- F - A sequence of char 'F' defines a position for custom text
- n - A sequence of char 'n' is a placeholder for the counter digits
The lower and upper bounds define a range of valid numbers to use, starting with the lower bound and ending with the upper bound. Note that the lower bound counter will not be used to specify "0000" to actually have the first counter as "0001".
Examples:
- Simple 5-digit schema: nnnnn^00000^99999
- 5-digit schema reset yearly: yy=nnnnn^00000^99999
- Yearly reset schema with text "INV" and year number separated by a hyphen (e.g. INV-2018-0001): yy=FFFFyyyyFnnnn^INV-2000-0000^INV-2100-9999
- As above but using "SUB" for Subcharter flights only, other flights falling back to "INV": SUBCHARTER_yy=FFFFyyyyFnnnn^SUB-2000-0000^SUB-2100-9999|yy=FFFFyyyyFnnnn^INV-2000-0000^INV-2100-9999
A dedicated invoice number can be created for any workflow type we have in the app (COMMERCIAL, MAINTENANCE, PRIVATE, TRAINING, OWNER, INTERNAL, RESERVED, CHARTER, SUBCHARTER, or SCHEDULED).
Additionally, you can set up your Dispatch, Email, Pricing, Payments, Fuel, Manifest, Cancellation, and flight Number settings in which we will give you a helping hand during the system setup process.
Dispatch
Deselect GenDec in emails for domestic flights
The GenDec document is a default attachment for all flights. Enabling this setting will make this an opt-in (i.e. not selected) attachment in Dispatch communications regarding domestic flights.
-gif.gif)
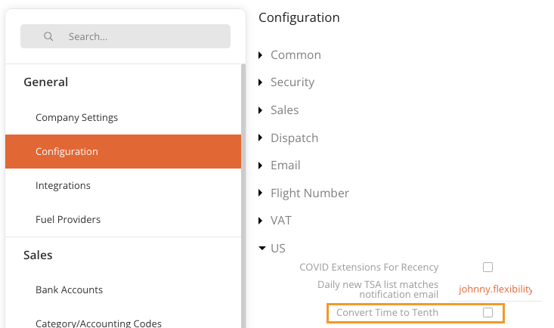
US
Times in Tenths
Fuel
Fuel Settings
Edit the various default fuel settings. These changes will be reflected across your FL3XX app. 
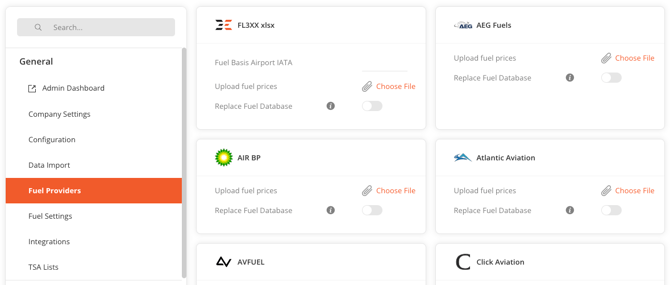
Fuel Providers
FL3XX xlsx
If your fuel data import file contains price indexes for multiple locations (e.g., DUS, LPA, VIE), indicate the specific location's price index you want to apply within FL3XX.
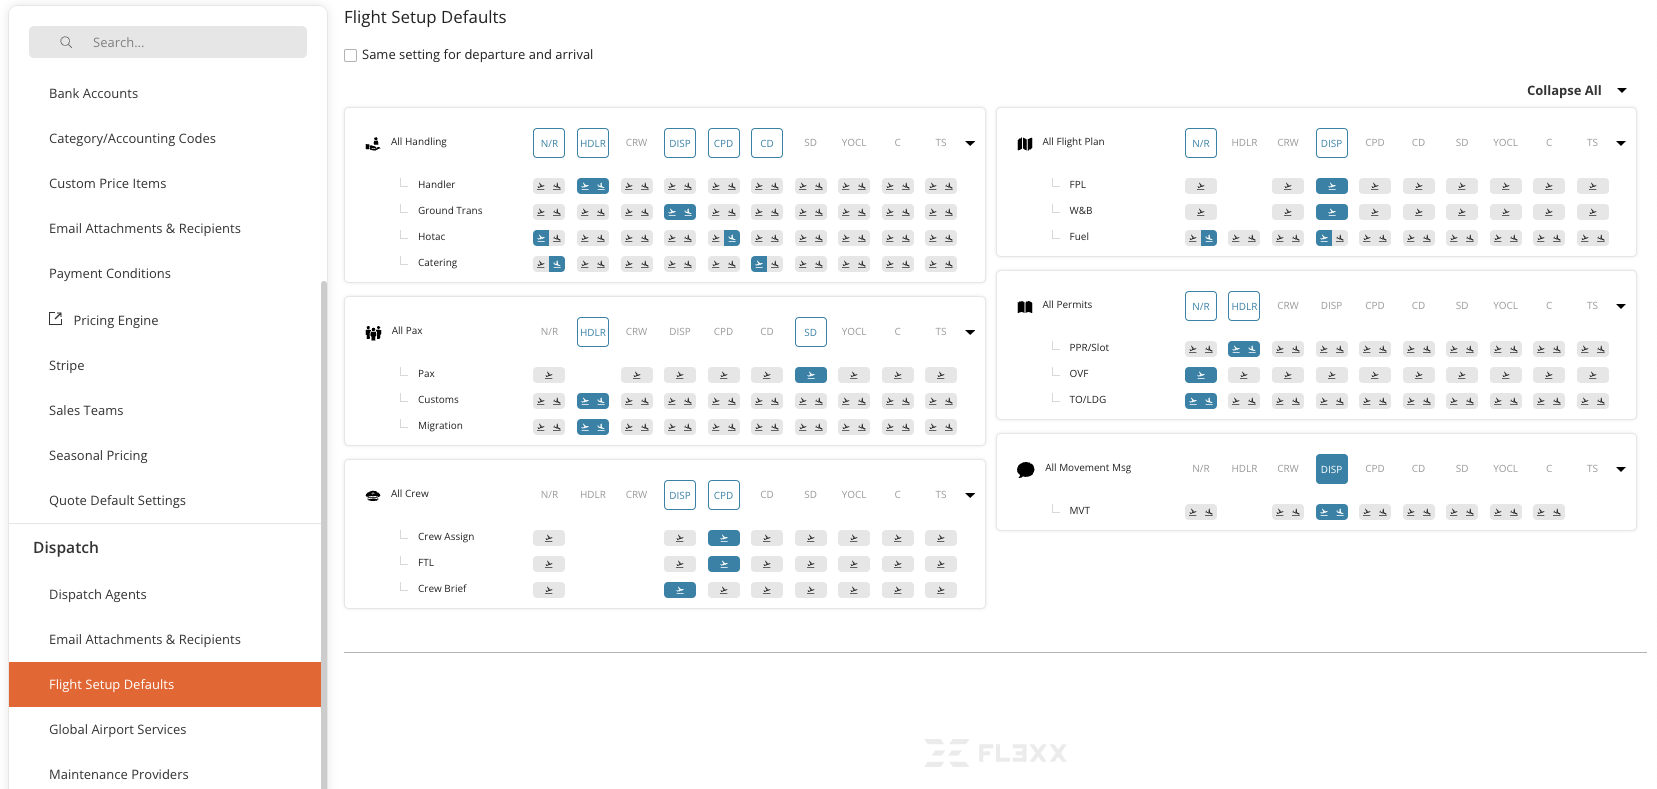
Flight Setup Defaults
In this section, you can determine the default responsibility during organizing a flight. In Dispatch, the defaults can be changed flight by flight if needed
Bank Accounts
In this section, you can add multiple Bank Accounts that will be used in different parts of the system. The Label designates how the account will be referenced throughout FL3XX. Description and Details are multi-line fields for entering pairs of information about the account: each line entered into Description should have a corresponding line with the associated data entered into Details, as shown below.
Note the  indicating the end of each line (Enter or Return key).
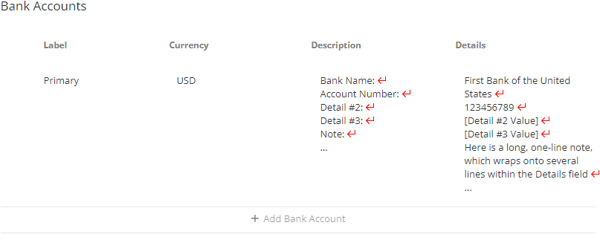
This information can then be used by FL3XX, for example, when generating an invoice for a booking where the currency is set to USD: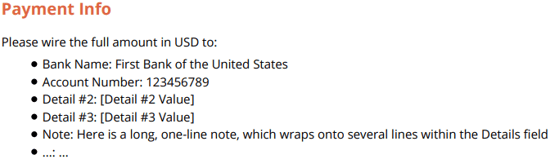
Ops Teams
If you divided your operations control into teams that handle flights for multiple aircraft, this is the place to set them up. Add or remove groups using the + and ![]() buttons. Click on a group to expand it into editing mode:
buttons. Click on a group to expand it into editing mode:
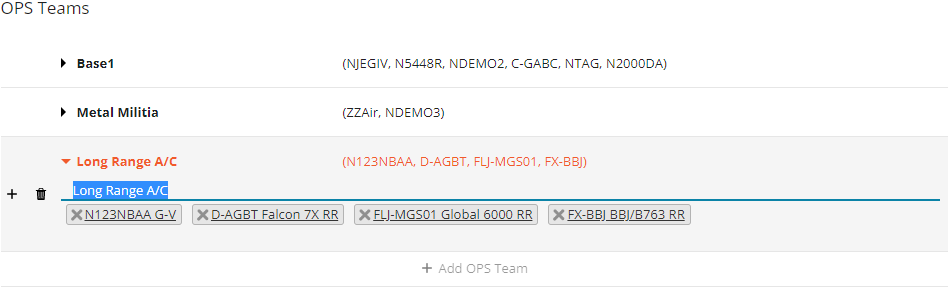
In editing mode, you can:
- Change the group name (see the blue highlighted region above)
- Remove aircraft from the group by clicking X on the respective tag
- Add aircraft by clicking in the lower portion of the box to open the aircraft list
Payment Conditions
Here you can set your default payment conditions that will be displayed in the Bookings and the Accounts
-png.png?width=622&height=236&name=image%20(1)-png.png)
Trip Support
(formerly Permit Providers)
We have a default list of permit providers, but you can add additional providers that you use for different permit types
-png.png?width=670&height=73&name=image%20(2)-png.png)
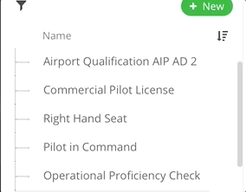
Edit Qualifications
We add all your qualifications during the system setup. You can change any settings of the existing qualifications or add new ones by opening Edit Qualifications.

Reordering Qualifications
Qualifications can be sorted and reordered to suit your needs. You can rearrange them alphabetically with a single click, or manually drag & drop them in any order you choose.
Click the sort button![]() to arrange alphabetically:
to arrange alphabetically:

Drag & drop to arrange manually:
TSA Lists [US Instances]
-
No Fly List
-
Selectee List
-
Cleared List
![TSA Lists [US Instances]](https://www.fl3xx.com/hs-fs/hubfs/TSA%20Lists-png.png?width=670&height=160&name=TSA%20Lists-png.png)
It is the operator's responsibility to get the lists from the TSA and upload them to the system. Once they are activated, the system automatically runs the following processes:
-
Auto-checking all Passengers on future flights in the system based on name and date of birth. Passengers are marked RED (NoFly match), YELLOW (Selectee match), and GREEN (Cleared match)
-
Between two list uploads the system auto-checks each passenger added to a flight and marks them when there is a match
-
The system re-runs the above process each time new lists are uploaded
-
The system checks all employees in the system against the three lists and sends an email to the operator-determined email address at 01.30UTC time when a match is detected
The lists can be uploaded by US operators in the Settings / TSA Lists section. There is an overview of the process by showing statistics such as upload date/time, number of matches per list, activation time stamp, and the user who activated it. For more information about uploading TSA lists, see How to Add a TSA List.
In the Reports module, you can also find a NoFly report that lists all matches for you and can be presented in case of a TSA check.
Quote Default Settings
Terms & Conditions
Here you can create and edit your T&C for use in charter offers.

You can also create and store several sets of T&C. And for our US customers, you can assign them to your different programs, just make sure you mark the corresponding checkbox.
If you require customised sales or dispatch templates, contact support@fl3xx.com with your request.
Reordering the Toolbar Time Zones
In the Configuration settings, under the "Time Zones in Toolbar" dropdown, you can now set your preferred order for the time zones displayed in the toolbar.

Use the up and down arrows to rearrange the time zones to your liking, then click "Save." After refreshing the page, your customized time zone order will appear in the toolbar.

Pax Tax: Marking Pax In Transit
To give you more control and accuracy across all applicable passenger taxes, you can manually mark transit passengers in the Pax section. When enabled, this setting ensures all tax calculations follow your selections instead of the system’s default logic.

|
Activate this feature in Settings → Dispatch using the "Enable Pax In Transit" toggle.

|
Email Attachment Defaults
Email Attachment settings determine which documents are automatically selected when sending Sales and Dispatch emails.
FL3XX uses two levels of settings to determine which documents are selected when composing Sales and Dispatch emails:
- Company Settings → Sales Email Attachments & Recipients or Dispatch Email Attachments & Recipients
- The individual document's "Send By Default" setting in the Aircraft -> Documents section
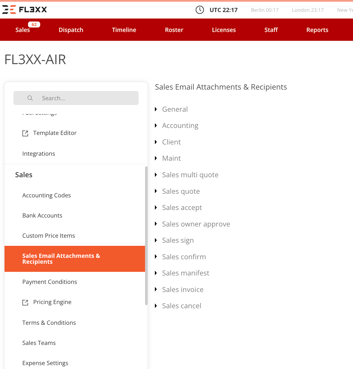
Important: The Company Setting always takes precedence over the document's Send By Default setting in the Aircraft -> Documents section.
Configuring Attachment Defaults
Navigate to:
- Settings → Sales → Sales Email Attachments & Recipients
- Settings → Dispatch → Dispatch Email Attachments & Recipients
Expand the email type you want to configure (for example, Sales Quote or Dispatch Crew Brief) and choose the desired setting for Aircraft or AOC attachments.
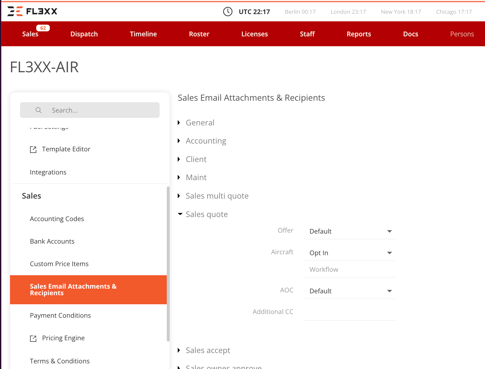
Available Options
| Setting | Behavior |
|---|---|
| Default | Uses each document's Send By Default setting. |
| Opt In | Documents are available as attachments but are not selected by default. |
| Opt Out | Documents are available and are selected by default. |
| Never | Documents are not available as attachments. |
Example
An aircraft document is configured as:
- Sales/Dispatch Attachment = ON
- Send By Default = ON
If the Company Setting for Aircraft is Opt In, the document will appear as an available attachment, but it will not be selected by default.
If the Company Setting is Opt Out, all eligible aircraft documents will be selected by default, regardless of the individual Send By Default setting.
Tip: If you want each Aircraft or AOC document to follow its own Send By Default setting, leave the Company Setting set to Default.
