
Avinode integration cannot be fully activated until the day you "go-live" in FL3XX for quoting and sales.
However, there are preparatory steps that can be completed beforehand!
Prerequisites for full activation:
- Aircraft profiles created in Aircraft module, including default pricing
- Profiles for salespeople created in Persons with appropriate role(s) and access
- Sales documents reviewed with T&C, aircraft photos, etc., ready to send
- Email settings (DKIM/SPF) set-up and tested
Preparatory Steps (before the day of activation):
- Contact Avinode (your dedicated contact or techsupport@avinode.com for International / us.support@avinode.com for North America) and state your intention to integrate with FL3XX. Request that they create an API token for FL3XX. Additionally, request they check/enable if needed: the Request Download setting & the Schedule Upload setting.
- Example:
Dear Avinode Support,
We are setting up an Avinode integration with FL3XX. Can you please assist with the following in our account:
1. Enable the Request Download setting
2. Enable the Schedule Upload setting
3. Make available an API token (with an Authentication Token) for FL3XX that we can retrieve
- Example:
- Login to Avinode (must have administrator access) and follow the steps outlined here: Retrieving Token to Set up FMS Integration to copy the Authentication Token for FL3XX. Note: the Authentication Token is needed to activate, not the API Token.
- Paste the Authentication Token into FL3XX Settings → Integrations → Avinode in the field Avinode Authentication Token. SAVE.
- Paste the following URL - https://services.avinode.com/api/ - into FL3XX Settings → Integrations → Avinode in the field Avinode Url. SAVE.
Once you have completed this step, your Avinode settings will resemble the screenshot below.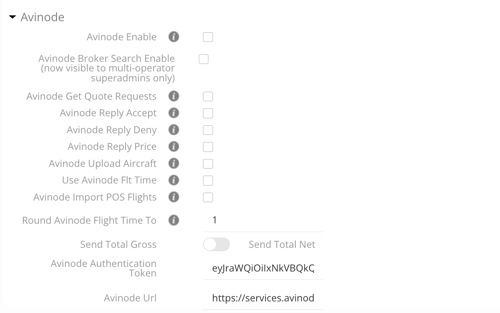
- In Aircraft module, open each tail that will be included in the Avinode integration (receive requests and sync schedule) and check the box next to Avinode in the Integrations section. SAVE each time.
Note: Publish on API enables other functionality and is not necessary.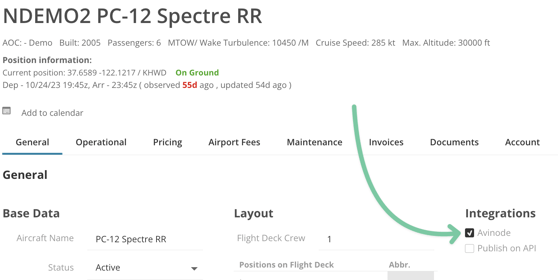
- Contact your FL3XX Onboarding coordinator or Support agent and inform them you have completed all the preparatory steps. Advise of the day and time you plan to activate so that FL3XX can be at the ready to activate with you!
Activation Steps (on the day of activation):
- Once all the above steps are completed, please inform FL3XX of the start date.
- Once enabled you can expect to momentarily see Avinode requests arrive in the left-hand list of the Sales module! You can now use and manage this integration per this guide: Avinode.