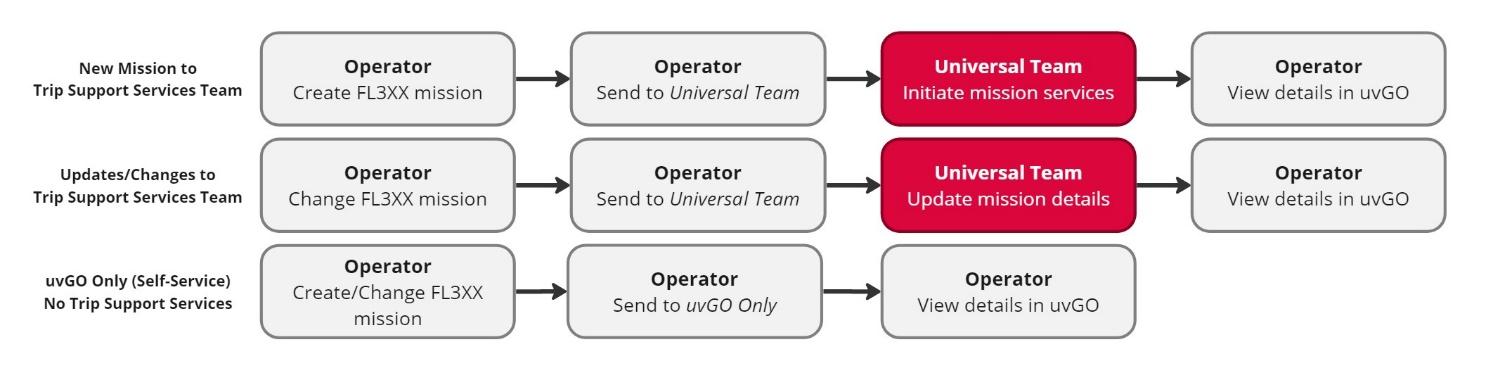
A. How to use
Prepare your mission in FL3XX Dispatch as usual. In this example, there are three international flights from US to Europe and back, where Universal's trip support will be requested.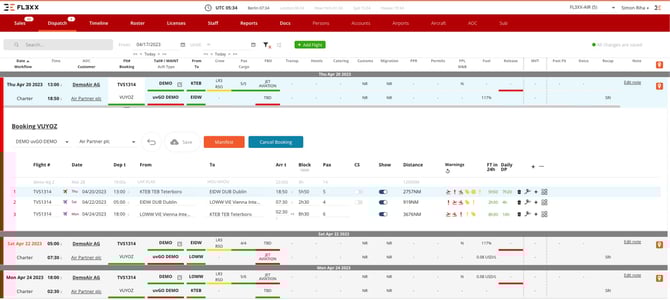
Use the dispatch checklist as usual. Set service status and do by whom normally. In the example in the screenshot below:
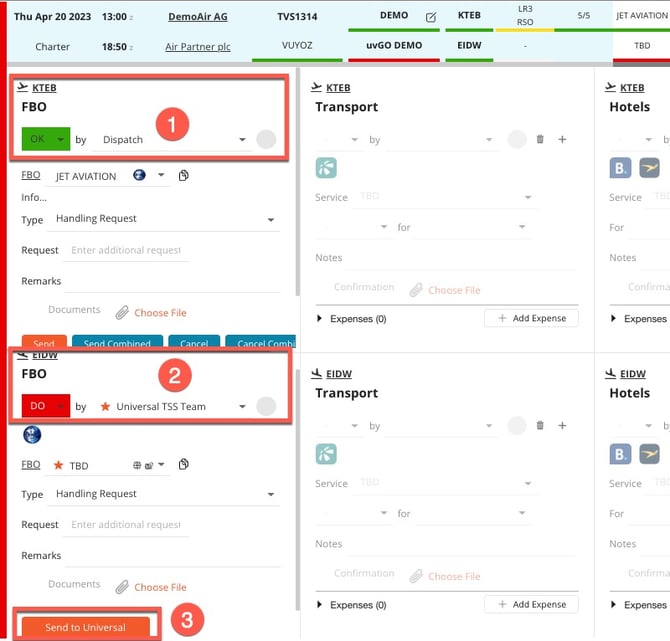
- In KTEB, I'll handle services by myself (e.g., my hometown).
- For arrival in Dublin (Ireland), I'll request Universal. I do it by selecting "by Universal TSS Team" option in the dropdown list.
- Before sending it to Universal, I complete as many service panels in each trip's flight as I need to and set my checklists.
Then, in whichever service by Universal TSS Team, I press the "Send to Universal" button. I do it only once since FL3XX will transmit the entire mission, not just one flight. It may take a few moments to receive the green notification in the bottom right corner.
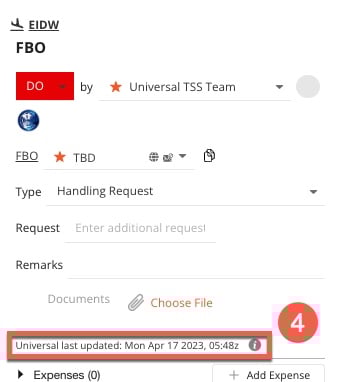
- The button has become a clickable link displaying when the trip was last sent to Universal.
How do I send the updates on my trip to Universal?
After you've made any changes in your trip in FL3XX relevant to Universal (e.g., times, crew, pax), simply press the clickable link to resend the entire mission to Universal. If using Universal's Trip Support Services, your team will receive and begin processing the applicable changes you made; eliminating the need for a new email thread or series of phone calls. If using uvGO only for self-managed services, you'll see your updates immediately in uvGO; eliminating the need to manage changes in multiple systems.
B. How does it work
IMPORTANT: Changes sent to Universal Team will be visible in uvGO after the details have been processed by your team. A temporary banner will be displayed at the top of a mission indicating “Your team is processing changes previously sent. Mission updates will not be visible until changes are complete.”
C. FAQ
What is sent to Universal?
- Aircraft registry, FAR part, and mission reference number
- Legs details: departure and arrival airports, dates, times, and estimated time en-route
- Passenger manifest and traveler details (e.g., passport, name, DOB, address, etc.)
- Crew manifest, pilot-in-command (PIC), and traveler details
What is not sent to Universal?
- Specific service requirements and assignments.
- Universal will arrange services per the customer profile on file.
- Any adjustments to a particular leg or mission must be communicated directly with the Universal Trip Support Team.
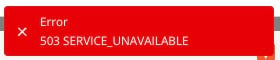
I see an error 503 - Service Unavailable in the bottom right corner after pressing "Send to Universal"
Please reconnect your uvGO account to re-enable the integration in Settings / Integrations / uvGO. If you can't access FL3XX settings, contact your system administration, not FL3XX support.
Does it sync from Universal back to FL3XX?
No. The communication works one-way from FL3XX to Universal. A mission must be initiated from FL3XX to Universal. A mission cannot begin at Universal (by phone or email, for example), and a connection established with a FL3XX mission afterwards.
Who do I contact for support?
- Contact customercarecenter@univ-wea.com for technical assistance with uvGO
- Contact support@fl3xx.com support for technical assistance with FL3XX
- Contact your Universal Trip Support Team for mission-related questions
D. How to set up
- First, decide on one uvGO account to link to FL3XX. This account will send and update trips from FL3XX to Universal. (Only one account is supported.)
- Please contact Universal's Customer Care Center on this if needed.
- Next, contact support@fl3xx.com to enable the Universal integration. FL3XX will review your trip support settings and configure them for use with Universal.
- Last, you'll connect uvGO in FL3XX Settings / Integrations to link both systems:
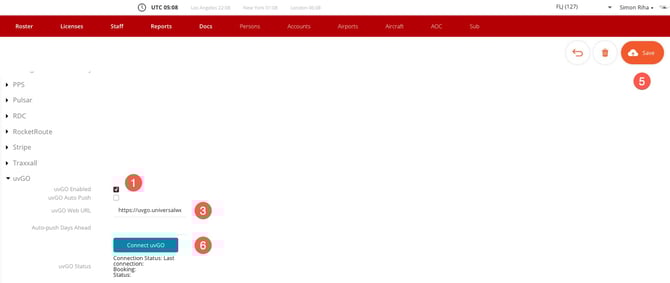
- uvGO Enabled: Enable
- uvGO Auto Push: Don't enable. Don't use it.
- uvGO Web URL: https://uvgo.universalweather.com
- Auto-push Days Ahead: Don't use. Leave this empty.
- Save your settings by pressing the Save button in the upper right corner.
- Now, you can press the Connect uvGO button
- A Universal sign-in page will appear. Follow the process to link both systems.