
About
PPS Flight Planning is a desktop- and cloud-based flight planning software.
How It works
Please note that to benefit from this function, you need to subscribe to "Scheduled Data Import / Export" with PPS.
If PPS is enabled, the flight data is automatically pushed from FL3XX to PPS every 20 minutes.
You can trigger an immediate sync action manually by the “Sync PPS” button in DISPATCH / FPL.
The following data is pushed from FL3XX to PPS:
- Flight numbers
- Scheduled departure dates and times
- Alternate airports
- Crew 3-letter codes (1 PIC, 1 SIC, up to 5 cabin attendants, up to 2 additional crew members)
- Number of passengers and their type (male, female, child or infant)
- "Total Weight" from Dispatch - Passengers = Pax + Luggage + Cargo + Animals(in Kg or lbs)
Activation
Contact both PPS and support@fl3xx.com to activate this integration.
Configuration
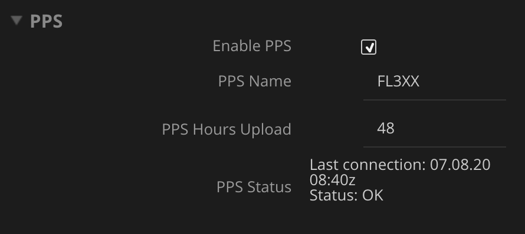
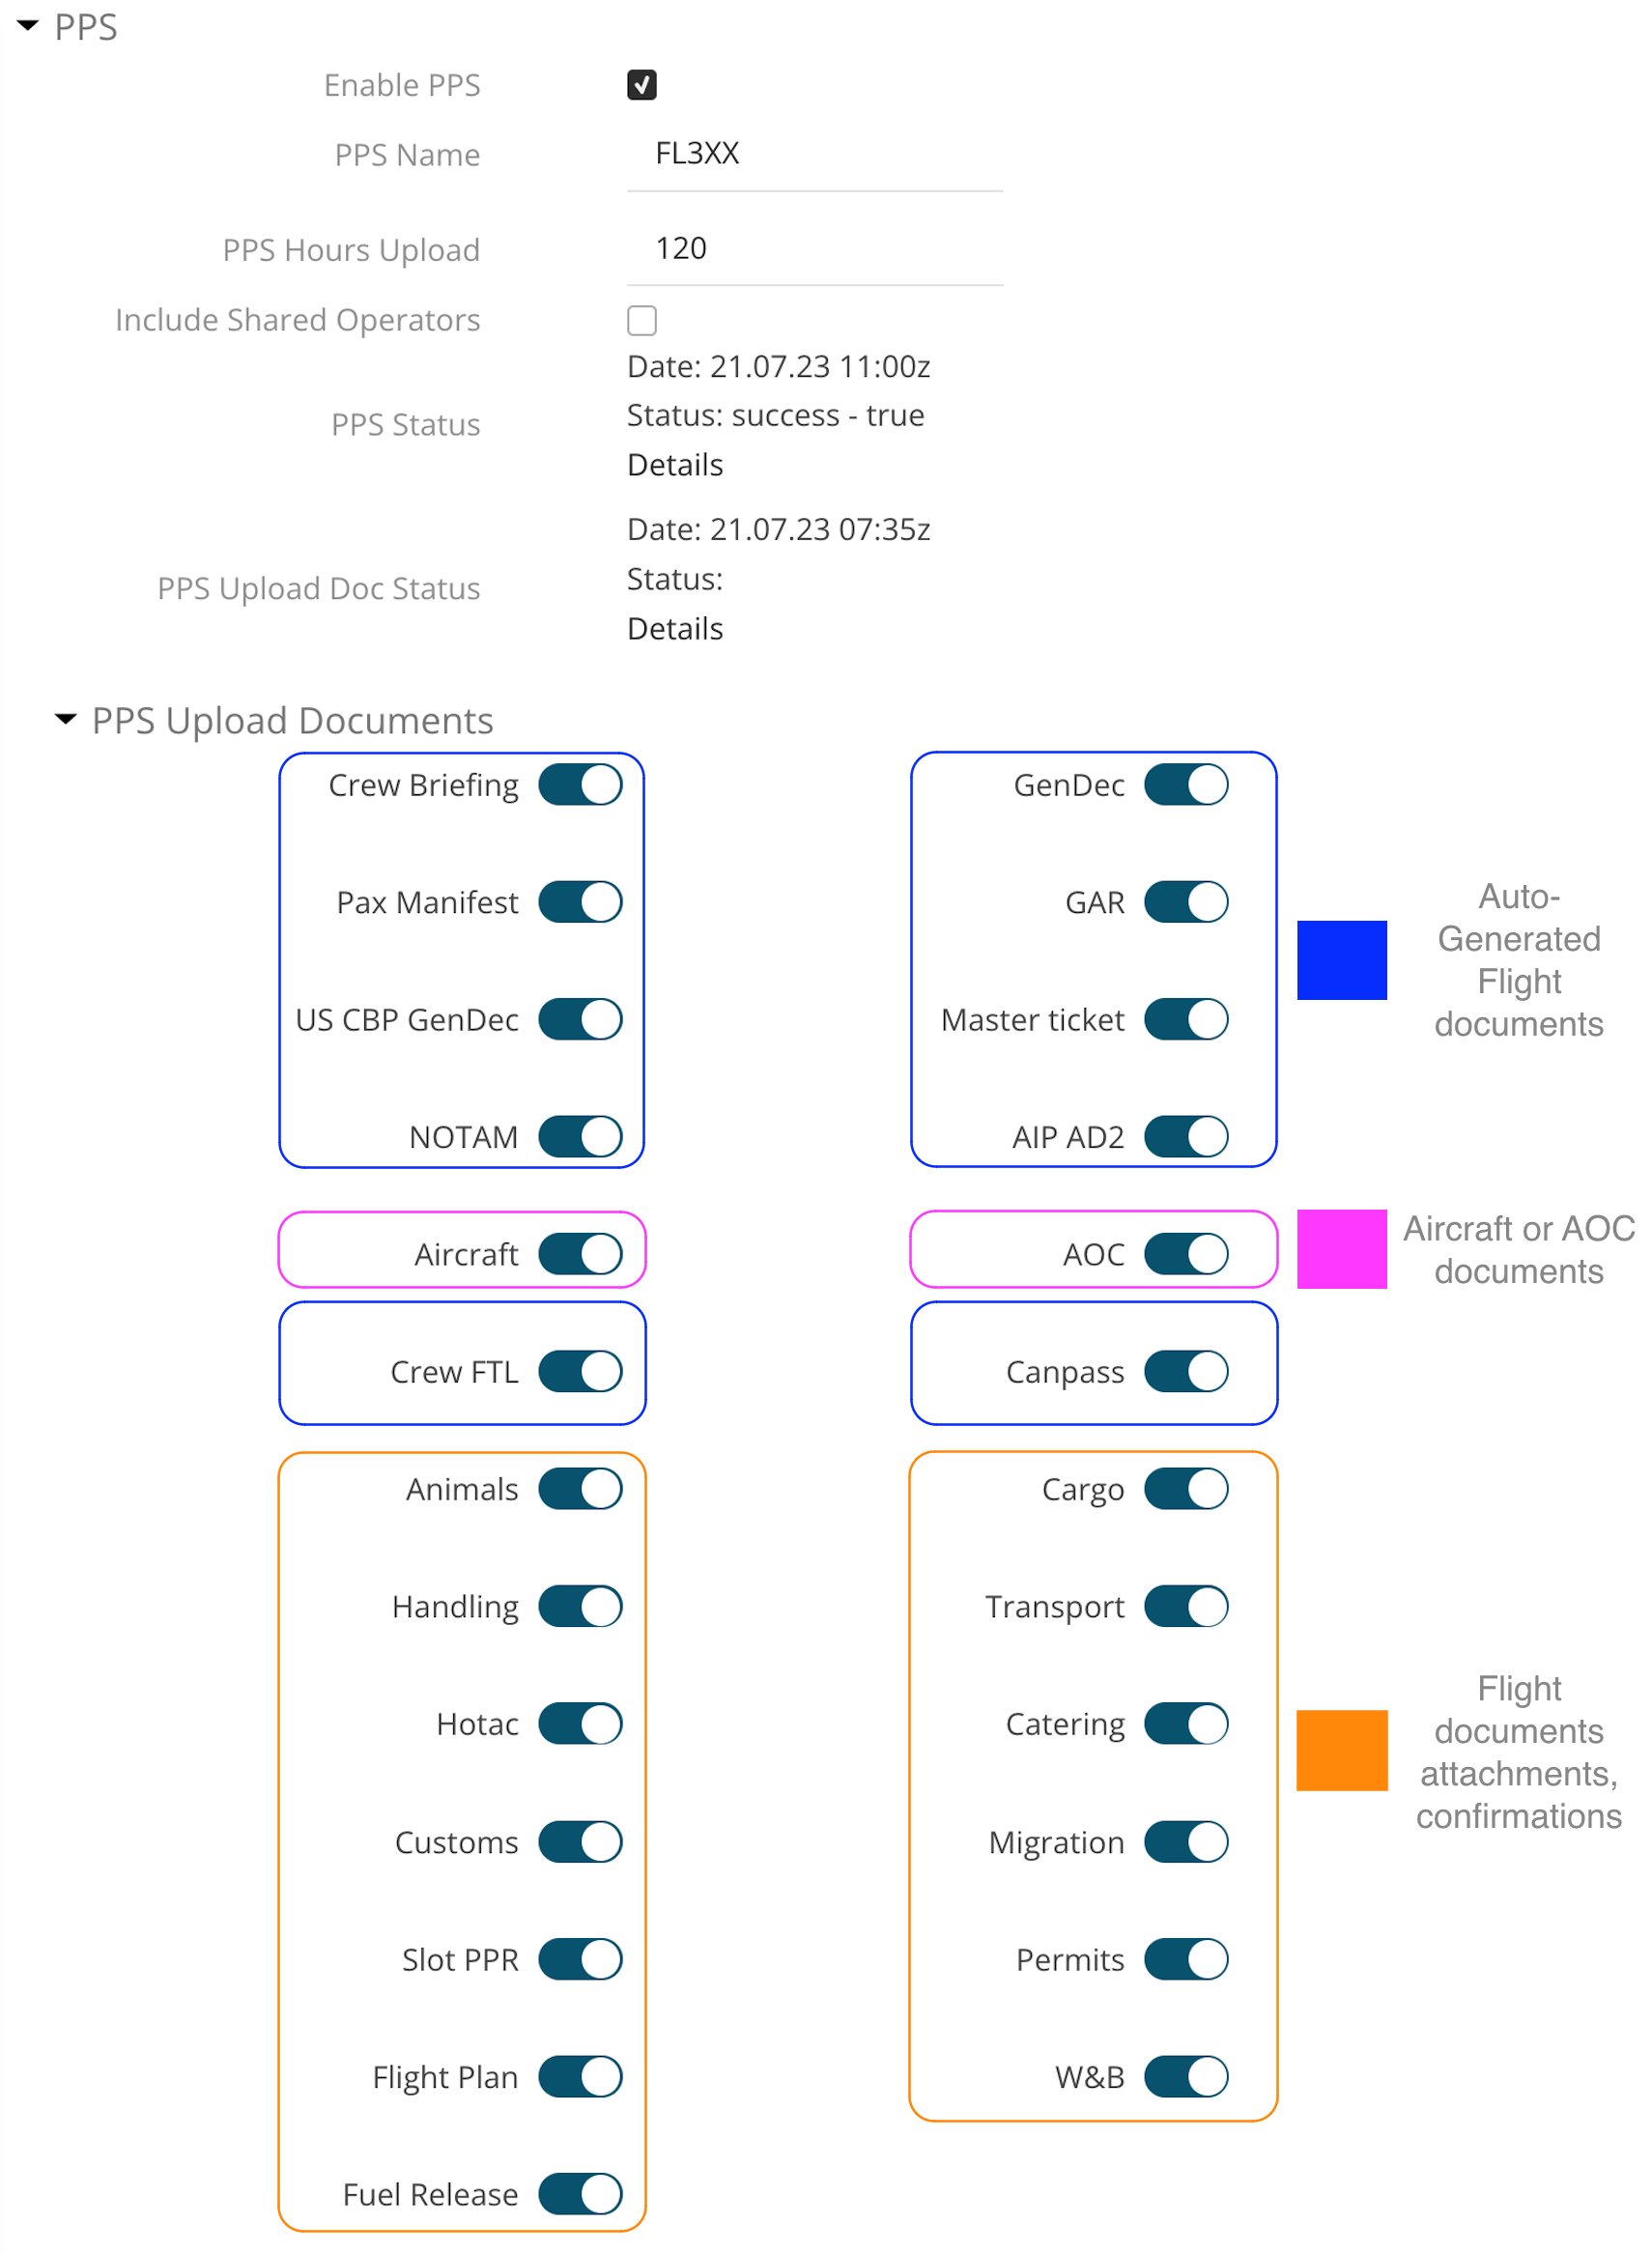
All settings for PPS are in COMPANY SETTINGS / INTEGRATIONS / PPS.
- Enable PPS: Enables/disables all subsequent functions
- PPS Name: Enter the customer "PPS Name"
- PPS Hours Upload: Uploads the aircraft schedule for the next nn hours into your flight list
Recommended value: 48
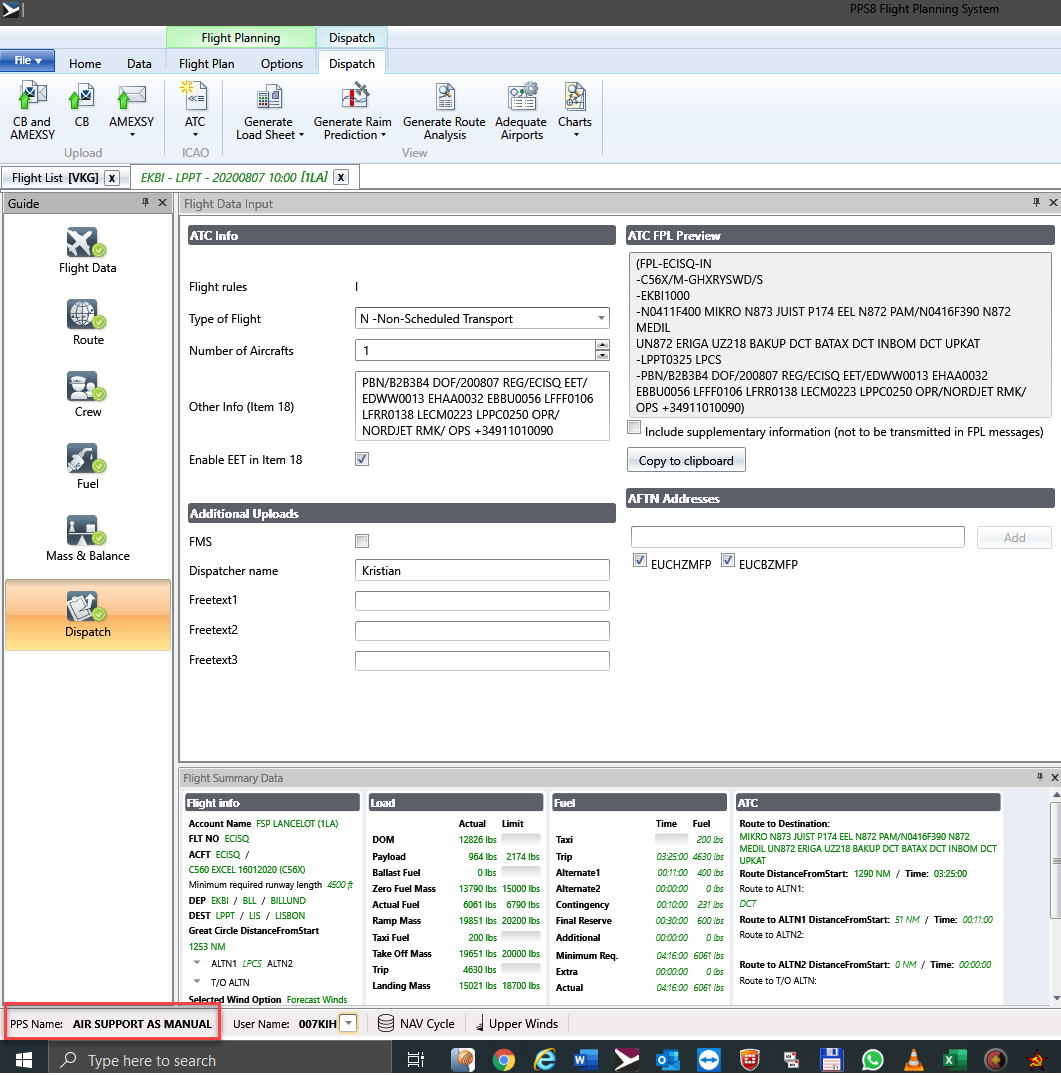
Where can I find my PPS Name?
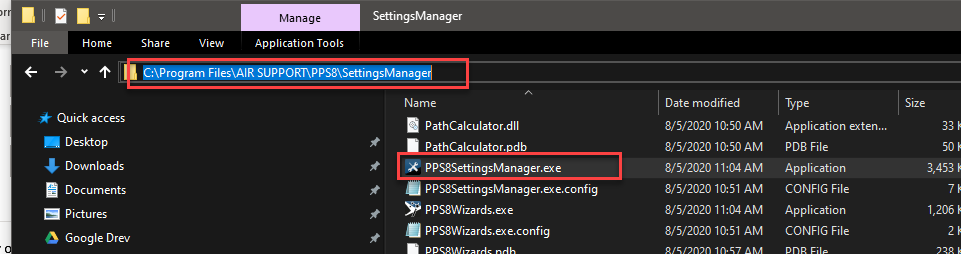
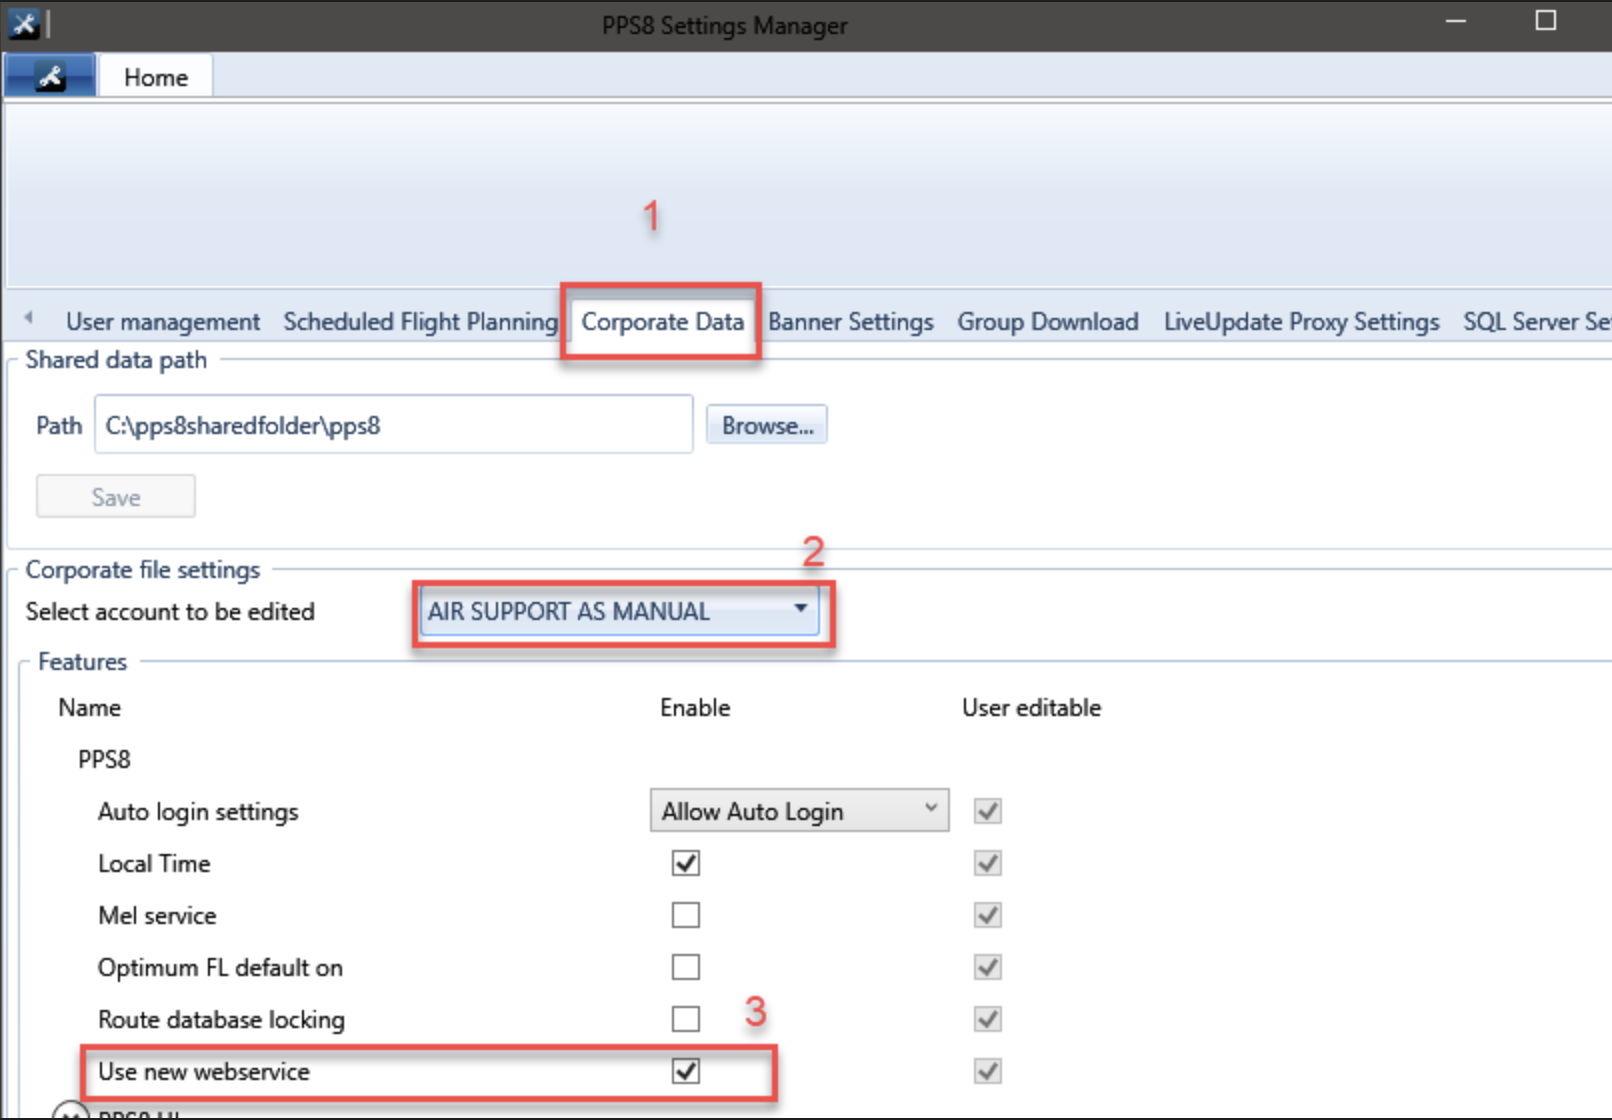
How to "Enable new webservice" for your PPS account in PPS?
- Run the "PPS8 Options (User)" as both PPS and Computer Administrator
- Open the settings manager in Windows 7, 8, 8.1, 10 manually:
- Go to this path: C:\Program Files\AIR SUPPORT\PPS8\SettingsManager
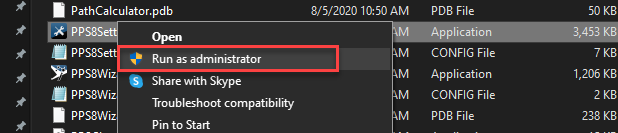
- Rightclick this and run as Administrator
- Go to the tab called Corporate Data (1)
- Select your PPS account in the dropdown (2)
- Put a tick in "Use new webservice" (3)
- Scroll down and select Save
- Now, restart PPS. Flight List will populate with the new webservice.
Note:
If the setup in FL3XX is correct but still not working, contact PPS directly at servicesupport@airsupport.dk.
Enabling The Upload Of Flight Documents to PPS Crew Briefing
This guide will walk you through the steps to configure which flight documents should be considered in the upload process, and execute the document upload to PPS/Crewbriefing.com
*At first, If you wish to enable this enhancement , please reach out to our dedicated support team.
To determine which types of flight documents will be sent to PPS/Crewbriefing.com for each flight, follow these instructions:
- In the Integration Settings, locate the “PPS Upload Documents" for PPS.
- Review the list of available flight documents that can be sent to PPS/Crewbriefing, such as Crew Briefing, GenDec, AOC/Aircraft Attachments, Service Confirmations, and more.
- Depending on your requirements, select the type of flight document you want to include in the upload process.
Collecting and Uploading Flight Documents
Once the desired flight documents are configured, you can now proceed to upload flight documents to PPS Crew Briefing. Follow these steps:
- Make sure that the flight or the series of flights are uploaded first to crewbriefing.com from PPS Flight Planning software.
- If the flight or series of flights are uploaded to crewbriefing.com, access the FL3XX "Dispatch Module" and navigate to the "Crew Panel” section for the desired flight.
- Look for the "Briefing" section and identify the applicable flights. These flights will have documents uploaded to PPS Crew Briefing.
- To initiate the document upload, click on the "Upload to PPS" button. Initially, the button will be Orange in color.
- After executing the upload, the button will change to Green, indicating that the process was successful.
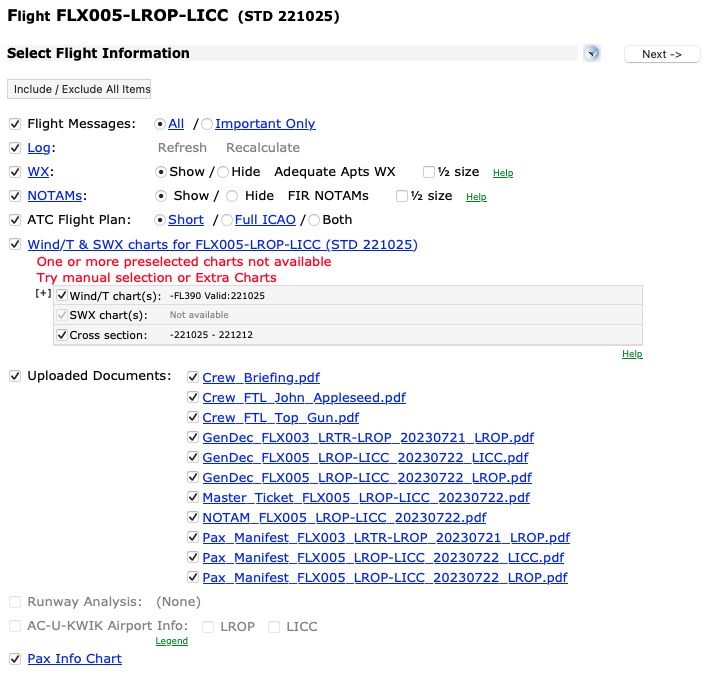
- Uploaded documents can be found in the corresponding flight uploaded to crewbriefing.com, under "Uploaded Documents" section
### Possible Error Encountered: ![]()
If you experience an issue during the upload process, it may indicate that one of your flights has an incorrect flight number. To resolve this, ensure that you remove any dashes ("-") and use "YRCIP" as the flight number, as in this example.
Since flights are uploaded in bulk, even a single error can halt the synchronization of all flights. It is crucial to identify and correct this issue to ensure successful uploads for all flights.